
Drunk with power after the relative success of my corset-making expedition last week, I dived right in to making the Regency coat that I need for my photo shoot. As I said previously, a few weeks ago I found this fabric–actually, six curtains (about 50″ x 90″ each), in an olive green brocade, and at once determined that I must make a coat of them.
This was, of course, insane. Self-taught seamstress, and one who has avoided highly tailored garments for most of her recreational sewing adventures (and these days, for most of us sewing is a recreational activity, no?). But I have a long and honorable tradition of doing ridiculous things. Avanti! I had downloaded the pattern from a website; this necessitated printing out 25 pages of pattern and tiling the whole thing together: This was an unsatisfactory process–the single part of the whole tailoring experience that almost made me forget the whole thing. But once I got the big, lumpy pattern sheet taped together and had traced the pieces onto parchment, I was ready to cut out my fabric:
 I made a muslin toile (a scratch try-on version) beforehand to make sure I was using the right size. Once I was reasonably secure with it, I cut out what the pattern calls my “fashion fabric”. In turn, I used the muslin as the lining of the jacket bodice. I put together the bodice half one night and half the next morning–and discovered what I will henceforth call “Robins’s First Rule of Sewing”: Friends Don’t Let Friends Sew Tired. I had sewn two pieces of the toile bodice in upside down, and pinned the two front pieces on the wrong sides (which would have worked had my breasts had about 18 inches between them, but as they do not, didn’t). So I pulled the seams, repinned and went onward, but I did feel just a little…stupid, I think, is the term. With the collar made and the bodice stitched, I put in the lining. And once again (although not with a pin) I managed to bleed on the damned project–fortunately, on the inside of the bodice lining where no one but you and I will ever know about it.
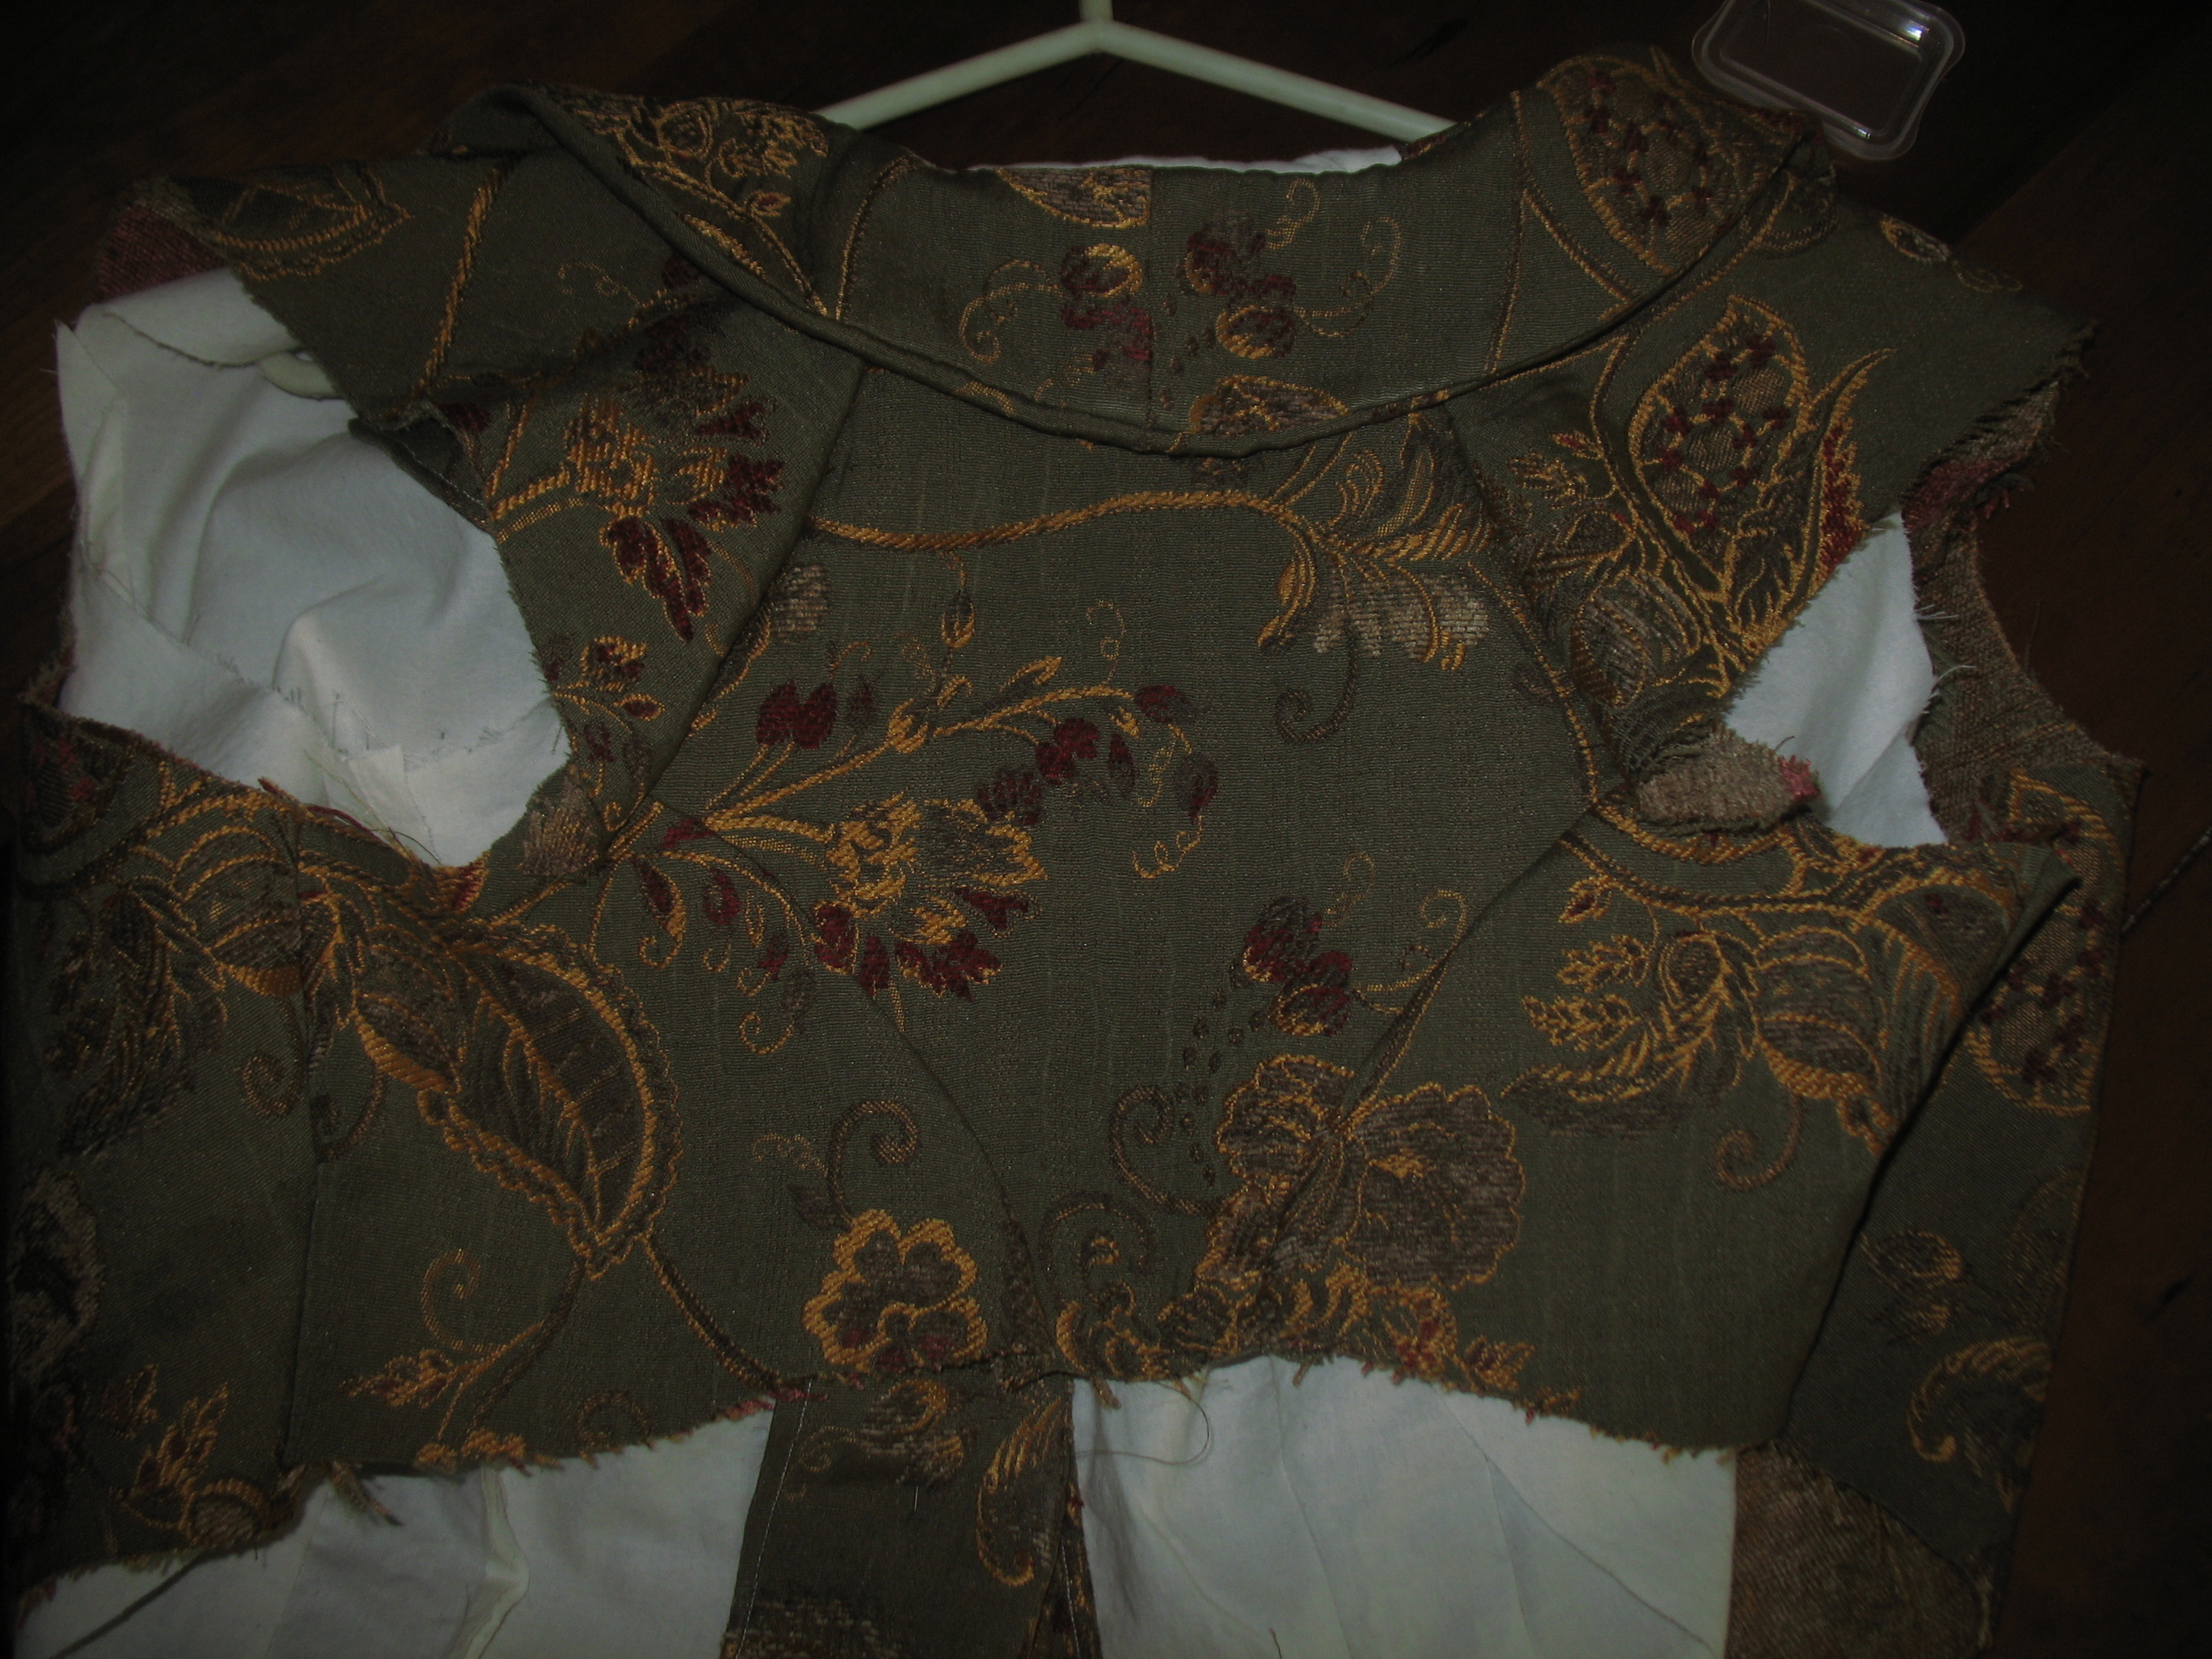
 And here is the jacket bodice with lining and collar in place, all sewn and pretty:
 Then the sleeves went in. They are large enough to fit over pretty much anything I want to wear under it in the way of sleeves. Now it looks really like a jacket:

Now the only major thing to do is attach the skirt. Look! It looks like a coat! I particularly like the back of the jacket, which has that lovely structure that I associate with Regency gowns: a diamond-shaped panel to which all the other pieces are attached.
 And here’s what the final product looks like (worn over the corset, of course, so it fits properly and I can figure out placement of the buttonholes and buttons. Note Emily-the-Dog, looking at the coat with awe, thinking “I could do that if only I had opposable thumbs!”
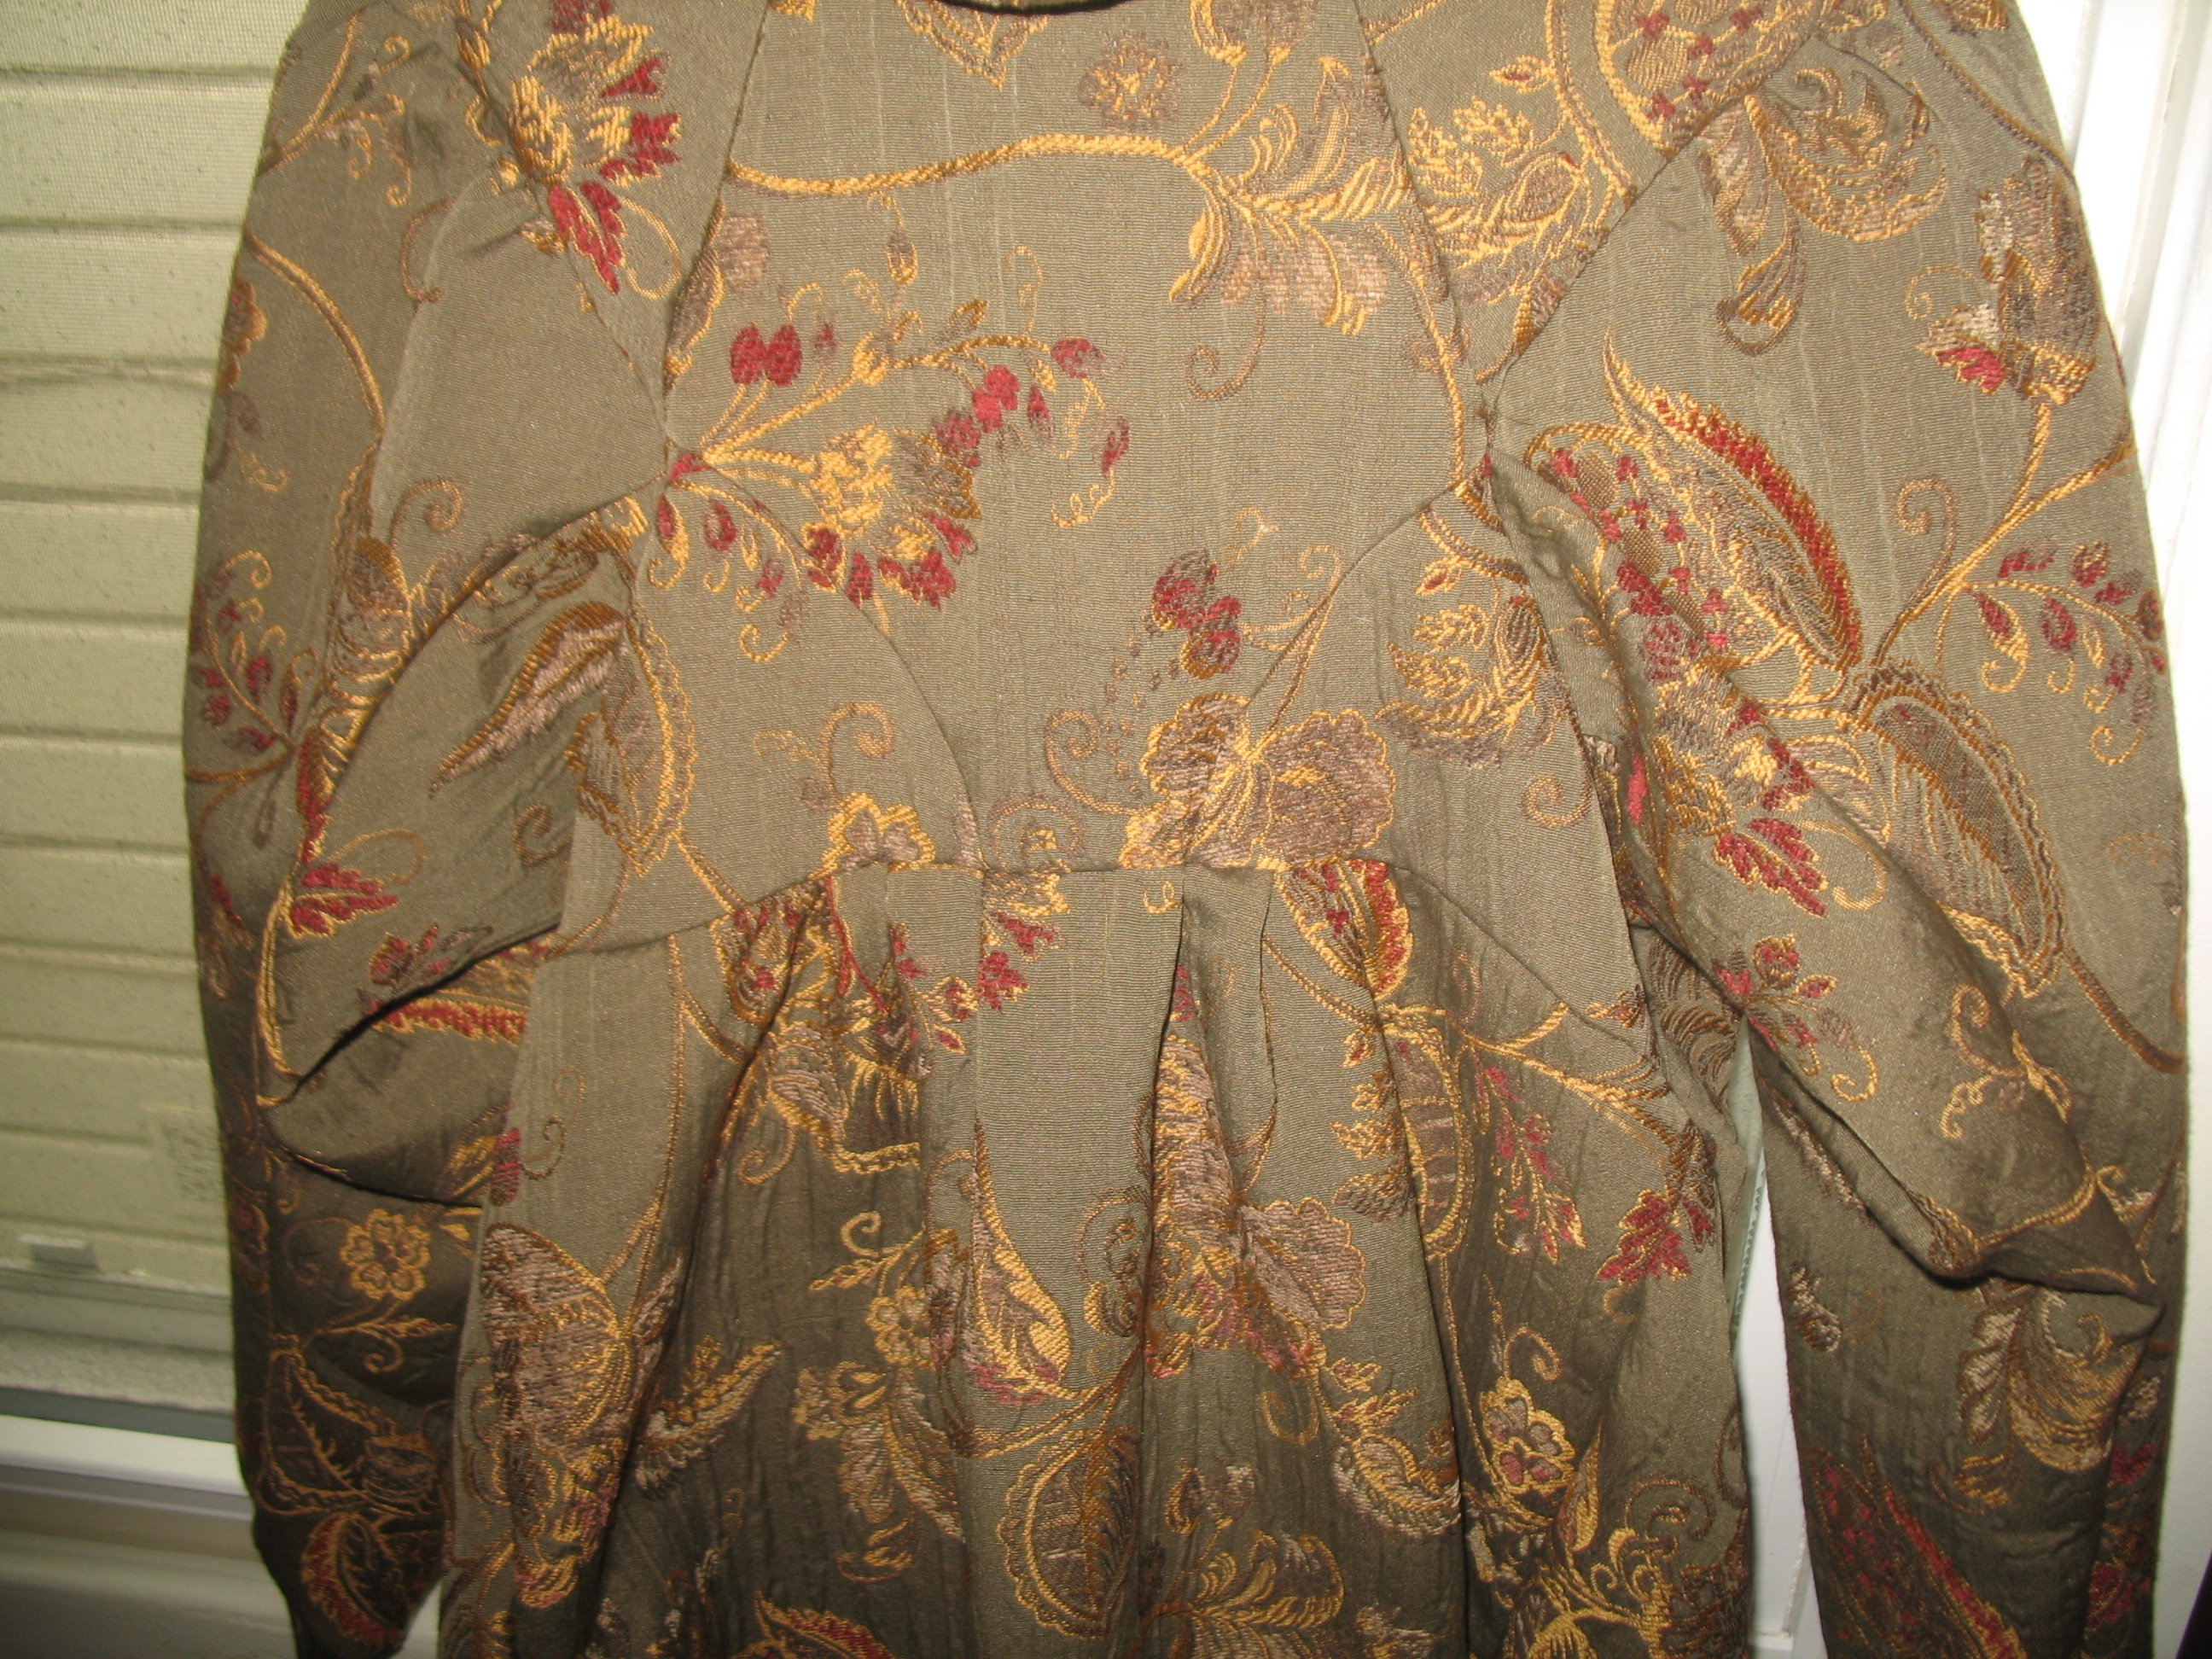
 Here’s one more shot of the back, because I love it so:
 And a slightly longer shot to show how long it is.
 It’s still missing the buttonholes, but everything else is done. Now I have to make the dress to go under it, but that’s going to have to wait until I get back from Readercon, and the pattern for the dress (on paper, this time) comes in the mail. For the moment I’m going to enjoy the possession of the coat, and the lack of pins, thread and snips of fabric underfoot.

July 15th, 2011 at 9:49 am
Outstanding! Go you!
July 18th, 2011 at 6:31 am
*UTTERLY* gorgeous. I am in awe!
February 18th, 2025 at 11:10 pm
I admire your dedication to completing this challenging project.